Search This Blog

Sunday, October 3, 2010

Baked Lemon Chicken


I finally got a new camera!! No more blurry cell phone pictures!  So, I should be updating my blog more regularly now!

This chicken may look ho-hum.  The ingredient list may even look ho-hum!  But just give it a try and I am quite sure you will be pleasantly surprised at how moist and how much flavor it has!

I made it for the first time several years ago.  I was leafing through a cookbook, and I had all the ingredients on hand, so I gave it a whirl.  I had written a note in the cookbook that it was "wonderful".  

Recently I was leafing through the same cookbook and saw that note.  I looked at the ingredients and thought, does this really live up to the "wonderful" I wrote down?  So I decided to find out!  I must say, it did indeed live up to that one word!!  It is wondeful!


 I prefer to make my own breadcrumbs.  It is so fast and in my opinion they taste much better!


First dip the chicken in butter/lemon mixture, then in the crumbs.


Place in a pan and drizzle with remaining butter/lemon mixture!  Simple as that!


The result:  moist, lemony, baked chicken!  
Now add some sweet potatoes and a salad and you have yourself a meal!


BAKED LEMON CHICKEN

  • 3 tablespoons butter, melted
  • 2 tablespoons lemon juice
  • 1 garlic clove, minced
  • 1/2 teaspoon salt
  • 1/4 teaspoon pepper
  • 1/2 cup seasoned bread crumbs
  • 4 boneless skinless chicken breast halves (4 ounces each)
 (I cut my chicken breast into smaller strips, or use tenderloins if you prefer)
  • In a shallow dish, combine the butter, lemon juice, garlic, salt and pepper. Place bread crumbs in another dish. Dip chicken in butter mixture, then coat with crumbs. 

  • Place in a greased 13-in. x 9-in. baking dish. Drizzle with remaining butter mixture. Bake, uncovered, at 350° for 25-30 minutes or until a meat thermometer reads 179°. 
                • Yield: 4 servings

To make your own breadcrumbs:  

Tear up any kind of bread into small pieces.  Layer on a baking sheet and bake at 350 degrees for 10-15 minutes or until dry.  Grind in food processor until they become small crumbs.  Add dried parsley, oregano, and basil.  Pulse a few more times.  And there you go! Seasoned breadcrumbs!  If you have extra, toss em in the freezer!


Tuesday, September 14, 2010

Chicken and Broccoli Stir-Fry


I LOVE stir-fry!  It's just so yummy!!  I am constantly trying out new stir-fry recipes, and this one is a keeper for sure!  A few great things about this recipe:  It was really quick and easy to make....took about 20 minutes, I had everything on hand, and it has great restaurant flavor!  

I found it on www.foodnetwork.com.  I typed in chicken stir-fry and LOTS of recipes came up!  This one had 5 stars and 265 reviews, so I figured it must be good!  One person even reviewed that her hubby thought it was leftovers from PF Chang's!


Mmm! I love it garnished with toasted sesame seeds and green onion! Adds a nice little crunch!


These aren't the greatest pictures, but unfortunately my camera got a little water on it at the beach and it is no longer functioning. :(  This is the best I could do with my phone!


CHICKEN AND BROCCOLI STIR-FRY
  • Marinate the chicken while you prepare the rest of the ingredients 

  • 1 pound chicken breast (about 2 breasts), cubed
  • 3 scallions, whites only, thinly sliced on an angle
  • 2 cloves garlic, minced
  • 1-inch piece peeled fresh ginger, minced
  • 1 tablespoon soy sauce
  • 2 tablespoons sugar
  • 1 tablespoon, plus 1 teaspoon cornstarch
  • 1 1/4 teaspoons salt
  • 1 tablespoon dry sherry
  • 1 tablespoon dark sesame oil
  • About 1/3 cup water
  • 3 tablespoons vegetable oil
  • 5 to 6 cups broccoli, trimmed sliced stalks and medium florets (keep the 2 cuts separate)
  • 3/4 to 1 teaspoon red chili flakes, optional
  • 1 tablespoon hoisin sauce
  • Garnish: toasted sesame seeds, optional
  • Serving suggestion: Jasmine rice

Directions

In a medium bowl, toss the chicken with the scallion whites, about half the garlic and ginger, the soy sauce, sugar, 1 teaspoon of the cornstarch, 1 teaspoon of the salt, the sherry, and the sesame oil. Marinate at room temperature for 15 minutes. Mix the remaining cornstarch with 1/3 cup water.

Heat a large nonstick skillet over high heat. Add 1 tablespoon of the oil and heat. Add the broccoli stems, and stir-fry for 30 seconds. Add the florets and the remaining garlic, ginger, 2 tablespoons of water, and season with 1/4 teaspoon salt, and pepper. Stir-fry until the broccoli is bright green but still crisp, about 2 minutes. Transfer to a plate.


Get the skillet good and hot again, and then heat 2 more tablespoons oil. Add the chicken and chili flakes if using. Stir-fry until the chicken loses its raw color and gets a little brown, about 3 minutes. Add the hoisin sauce, return the broccoli to the pan and toss to heat through. Stir in the reserved cornstarch mixture and bring to a boil to thicken. Add more water if need to thin the sauce, if necessary. Taste and season with salt and pepper, if you like. Mound the stir-fry on a serving platter or divide among 4 plates and garnish with sesame seeds; serve with rice.


Notes: The garlic and ginger can be chopped together in a minichopper to save time.
Scallion greens can also be used to garnish, if you like that extra onion-y flavor and you want to use up the scallions.

The broccoli stems are used (love all that fiber) to add textural contrast and also to help bulk up the dish, and why waste them?

I reduced the amount of broccoli and added some thinly sliced carrots (I cut them into coins).  I added them with the broccoli stems and they came out great!  I also reduced the amount of salt and used pineapple juice instead of dry sherry.  You could also use orange juice if you prefer.  I just did a sprinkle of crushed red pepper and that gave it the perfect kick. And definitely use Jasmine rice! It is so tasty! 

Tuesday, September 7, 2010

Corny Chicken Wraps


Some days, there just isn't enough time to plan for dinner!  Then 4 o'clock comes around and you need to think of something quick!  Try this out next time that happens! (I am NOT the type of cook who plans menus ahead weeks in advance! I just can't do it!  I have tried.  So there are days when I have the "what should I make for dinner?" problem!  I know there are some of you that do plan ahead, and I marvel at that, but it's just not me!!)


I love these wraps! They are flavorful, very fast to prepare, and they don't call for a long list of ingredients!  You actually may have every ingredient in your house right now!


In a pan heat up frozen corn, black beans, salsa, taco seasoning and pre-cooked chicken.  I used the meat from a rotisserie chicken.


This is my favorite grocery store salsa.  The brand is La Mexicana and it is found in the produce department.  I don't know if they have it in your area, but look for it! It is excellent!


On a tortilla, put on the chicken mixture, shredded cheese, sour cream, and salsa.  You can even mix the sour cream right into the chicken mixture right before serving. It is great both ways!


CORNY CHICKEN WRAPS

1 cup fresh or frozen corn
1 can black beans, drained and rinsed
1 cup salsa (or more if needed)
2-3 cups cooked chicken, diced
1/2-1 pkg. low sodium Taco Seasoning
Cheddar cheese, shredded
sour cream
salsa for topping 
tortillas

In a saucepan heat corn, beans, salsa, taco seasoning, and chicken until heated through.  Warm tortillas in oven wrapped in foil for 10 minutes at 350 degrees.  On each tortilla layer chicken mixture, cheese, sour cream, and salsa.  

Serve with some green beans and dinner is ready! (Probably in less than 15 minutes too!)

Friday, September 3, 2010

Irresistible Double Chocolate Muffins

My husband loves chocolate muffins.  Especially the ones at the Costco Bakery.  Because he likes them for breakfast, I am always looking for ways to make them healthier.  And believe it when I say that those Costco muffins are just flat out bad...in more ways than one! I found this recipe online.  I admit, I was quite skeptical at how they would taste.  Or I should say, how I thought he would think they would taste!  

The reviews for the recipe were great, so I decided to give them a whirl.  Of course I didn't tell my hubby until AFTER he ate one exactly just how healthy they were!  I didn't want any preconceived notions in his head affecting the taste!  He loved them!  I was thrilled!  

Mission accomplished.


Who knew healthy could look so lovely?


Ready for baking!


Go ahead, have one or two!  


IRRESISTIBLE DOUBLE CHOCOLATE MUFFINS


 1 cup whole wheat flour
3/4 cup ground flax seed
1/2 cup wheat germ
1 teaspoon baking soda
1 1/2 teaspoons baking powder
1/2 cup cocoa powder
1 tablespoon ground cinnamon
1/2 cup miniature semisweet chocolate
chips
1 cup low-fat buttermilk
3/4 cup pumpkin puree
1 cup brown sugar
1 egg
1 teaspoon vanilla extract
1. Preheat an oven to 400 degrees. Grease 12 muffin cups, or line with paper muffin liners.
2. Combine flour, flax seed, wheat germ, baking soda, baking powder, cocoa powder, cinnamon, and chocolate chips in a large bowl. In another bowl, beat the buttermilk, pumpkin puree, brown sugar, egg, and vanilla until smooth. Gently stir the wet ingredients into the dry, mixing just until combined. Spoon equal amounts of batter into muffin cups.
3. Bake until a toothpick inserted in the center of a muffin comes out clean, about 20 to 30 minutes.
 The only thing I changed on this recipe is I did 1 cup of milk chocolate chips instead of 1/2 cup semi sweet chips.  --My husband prefers milk chocolate...my personal motto is the darker the better! I just can't convince him of that though! (And believe me I have tried!)

Thursday, September 2, 2010

Blue Ribbon Blueberry Buckle

Hello! I hope each of you had a fabulous summer!  I sure did!  Summer is by far my favorite season of the year!  I love all of the fresh fruits and vegetables that actually taste like they are supposed to.

  I guess you could say I took a sabbatical from blogging.  I have lots of recipes to write about though because I definitely didn't stop cooking!  So keep checking back...I promise I won't ever take that long of a break again! :)

Many of my upcoming recipes will be focused on summer's bounty....I sure wished I could have gotten these recipes on here when your garden was still producing, or the berries were actually still in season, but sometimes life just doesn't go like you want it to! :)

The following is one of my favorite ways to use blueberries:


This cake is thick, moist, and so flavorful!  It is simply fabulous!  It isn't too thick, so it doesn't dry out during baking.  It practically melts in your mouth.  And if that weren't enough, it is filled with antioxidant rich blueberries!  I can't even describe how delicious it is, so you just might have to make it!


This picture is all about the glaze!! Look at how shiny and beautiful! If you can't tell, I love a basic glaze!  In fact, you could probably glaze a shingle and it would be tasty!! :)


Thanks to my dear mother who passed this recipe down to me!  She made it throughout my childhood and we always gobbled it up!  Somehow though it tastes better today than it ever has!  (Maybe cuz I am a grown up now!!?)


BLUE RIBBON BLUEBERRY BUCKLE

1/3 cup butter, softened
1 cup sugar
1 egg
1 cup milk
1/2 tsp. vanilla extract
2 cups flour
3 tsp. baking powder
1 tsp. salt
2 cups fresh or frozen blueberries
(if using frozen berries, thaw and drain)

In a bowl beat butter and sugar together until light and fluffy.  Add egg, milk, and vanilla and mix well.  Add dry ingredients and beat on low speed for 30 seconds.  Beat for 2 more minutes on medium speed scraping sides of bowl occasionally.  Spread half of batter in a greased 9x13 pan (for cakes I prefer metal over glass).  Sprinkle with 1 cup of blueberries.  Pour the rest of the batter over top.  Sprinkle with remaining 1 cup blueberries.  Bake at 350 degrees for 35 minutes or until toothpick inserted near middle comes out clean.  Drizzle warm cake with glaze. (Recipe below)


Glaze for Blueberry Buckle:

1 cup powdered sugar
2 T. milk
1/2 tsp. vanilla extract

Mix together in bowl with wire whisk.  Drizzle over cake using a spoon.

Wednesday, June 9, 2010

Grilled Pizza


I love pizza! And I really love grilled pizza!  It is easy and so delicious! I must confess. There was a piece leftover in the frig, so I ate it for breakfast this morning.........Cold.  And I enjoyed every bite!


My mom found this recipe in a motor home magazine and cut it out for me.  What I like about it, is the dough goes right onto the grill, no using a pizza stone, so less mess to clean up after! Plus, they cook quickly!


I like BBQ chicken pizza, but you can make them however you like! 


Mix the warm water and honey.  Then add the yeast. It should foam up like this. 


After the dough has risen, put onto a floured board and cut into 4 pieces. I like to use a pizza wheel.


Roll out each piece into an 8 inch circle.


Put the dough directly onto the grill.  The grill should be medium-high.  I should have taken a picture of my first one.  I had the grill on too hot and the bottom scorched! I advise to start with medium heat and you can always turn the heat up if it isn't cooking.


After 3-4 minutes of grilling, dough should have grill marks. Place grill mark side up and layer on your toppings.


This pizza has BBQ sauce, mozzarella cheese, cooked seasoned chicken tossed in BBQ sauce, and onion. I like to use red onion, but I didn't have any on hand and I wasn't about to run to the store!  Cook on the grill for several minutes until cheese is melted.


Top pizza with chopped cilantro and enjoy!!


GRILLED PIZZA


 PIZZA DOUGH
1 T. honey
1 cup warm water
2 tsp. active dry yeast
3 cups flour (I use whole grain flour)
1 tsp. salt
2 T. oil

BBQ CHICKEN PIZZA TOPPINGS
1 lb. boneless skinless chicken breast or tenders, cut in 1 inch pieces
1 T. olive oil
Emeril's Essence Seasoning
 1 cup plus 2 T. BBQ Sauce
2-3 cups Mozzarella cheese, shredded
1/4 of a red onion, sliced
1/2 cup chopped cilantro


For the dough:

Feel free to use ready made dough from your local grocer.  I just prefer to make my own. It is very easy, even for a beginning yeast baker! Give it a try!

In a small bowl, dissolve the honey in the warm water. Sprinkle the yeast over the water and stir until it dissolves. Let the yeast mixture stand for 5-10 minutes, until a layer of foam forms on the surface. In a large bowl, combine the flour and the salt. Make a well in the center of the flour mixture and pour the olive oil and the yeast mixture. Stir the flour into the wet ingredients, until all the flour is incorporated. If its too dry, add more water. On a lightly floured surface, knead the dough for 15 minutes, until it is smooth and elastic. Shape the dough into a ball and put in in a well-oiled bowl. Cover with a moist towel and let rise in a warm place until double in bulk (about 1 1/2 hours). 

I use my kitchen aid mixer for the dough. And for the kneading part, just put the mixer on speed 2 and let it do all the work! Just set the timer!  This dough can also be made the day before you need it.  Just let it rise, then punch down and put in the refrigerator.  Take it out an hour or two before you make the pizza.  The dough will actually have more flavor if prepared the day before.

For the pizza: 

In a large frying pan, heat the olive oil on medium high heat. Add chicken pieces. At this point I sprinkled with Emeril's Essence seasoning. Or use whatever you like. Saute chicken until cooked through.  Toss with 2 T. BBQ sauce.

Punch the dough down, and divide into 4 equal portions. Roll out each portion into an 8 inch flat circle.  Gently place rolled dough on the grill and close the lid.  It will puff up and get grill marks on the bottom.  Remove it after 3-4 minutes.  If the bottom is burnt, adjust grill temperature and time.  Set the pizza on a board, grilled side up.

Spread 1/4 cup barbecue sauce over the surface of the dough. Layer on 1/4 of the cheese, chicken, and onion.  Put back on the grill and close the lid.  Remove when the crust is crispy and cheese is melted.  Sprinkle each with cilantro.  

NOTE ON BBQ SAUCE:
If I don't feel like making my own sauce recipe, I use Sticky Fingers brand Carolina Sweet sauce.


 BBQ Sauce:
1 cup ketchup
1/4 cup BBQ sauce (I like Sweet Baby Ray's or Bull's Eye)
1/4 cup brown sugar
1/8 tsp. garlic powder

Combine all ingredients with a whisk until smooth.

For all other pizza flavors, make sure all ingredients you put on the pizza are cooked.  They are not on the grill long enough to cook the meat.  Do not overload pizzas--they will be soggy.


Tuesday, May 25, 2010

Creamy Vegetable Bow Tie Toss


Wow! A month has gone by since my last post! Too much has been happening, I guess! First my computer was full of viruses and was in-operable.  Then we were out of town for a while.  And so on and so forth!

This hot pasta dish is a WONDERFUL side dish! Full of flavor! And it can use up that garden produce you will be yielding soon, if you have a garden that is!  If you don't have a garden, get a few pots and plant some parsley, thyme, and basil!  They are easy to grow and nice to have on your back porch!


Creamy, fresh, and fabulous!


Cook the veggies until crisp-tender! 


The tasty sauce with fresh basil and parsley.


The recipe calls for bow tie pasta, but all I had on hand was rotini. Anything works!


                         Creamy Vegetable Bow Tie Toss

Ingredients

  • 12 ounces uncooked bow tie pasta
  • 2 cups sliced fresh mushrooms (I omitted)
  • 2 cups cut fresh asparagus (about 1/2 pound)
  • 2 medium sweet onions, finely chopped
  • 2 medium carrots, sliced
  • 2 medium zucchini, halved and sliced
  • 1 medium sweet yellow pepper, julienned
  • 1/3 cup butter, cubed
  • 2/3 cup chicken broth
  • 1 cup (8 ounces) sour cream
  • 1/2 cup prepared ranch dip
  • 1/2 cup grated Parmesan cheese
  • 1/4 cup minced fresh parsley
  • 2 tablespoons minced fresh basil
  • 1/2 teaspoon salt

Directions

  • Cook pasta according to package directions. Meanwhile, in a large skillet, saute vegetables in butter for 5 minutes. Stir in broth;cook for 3 minutes or until vegetables are crisp-tender.In a small bowl, combine the sour cream, dip, Parmesan cheese,parsley, basil and salt; stir into skillet and heat through. Drainpasta; add to the skillet and toss to coat.  Yield: 12 servings.
Nutrition Facts: 3/4 cup equals 253 calories, 12 g fat (7 g saturated fat), 30 mg cholesterol, 324 mg sodium, 29 g carbohydrate, 3 g fiber, 8 g protein.


Thursday, April 22, 2010

Simple Cheese Lasagna


My niece Lacey borrowed me a cookbook called America's Test Kitchen's Family Cookbook.  It is an awesome cookbook if you are looking for some great recipes! 

This lasagna recipe comes from that cookbook.  I love how fresh it tastes!!  The main recipe is meatless, but there is a variation where you add ground beef to the sauce.  The first time I made it I did it meatless, and it was excellent!  When I made it this time, I decided to add steamed spinach for extra nutrients, and cooked ground turkey breast for extra protein.  The result:  AWESOME!  We loved it and so did our baby!

I halved the recipe and made it in an 8x8 pan, but I will write the recipe for a 9x13 pan.  Another idea if you have a small family, is to make the whole recipe and put it in two smaller pans.  Bake one for dinner, and freeze one for later!


Who says lasagna has to full of fat and unhealthy?  I use part-skim ricotta, part-skim mozzarella, and with the spinach and ground turkey breast, it cuts off fat, cholesterol, and adds great vitamins and nutrients!


These are my favorite brand of canned tomatoes! They are very fresh tasting!


If you have never used ground turkey breast, this is what it looks like cooked.  I added onions and dried spices to it also!  Make sure and get the turkey breast, and not just ground turkey.  The regular ground turkey has a lot of fat, where as the breast is 99% fat free.

I am always looking for healthier ingredients and ways to cook!


The chunky tomato sauce with the cooked turkey breast added in.


The tomatoes were pretty large, so I decided to use a hand blender to make a less chunky sauce so it would be easier for my baby to eat.


Spread a little sauce on the bottom of the pan. Then put a layer of noodles.  The original recipe called for no-cook lasagna noodles, but I just buy the regular kind and cook them.


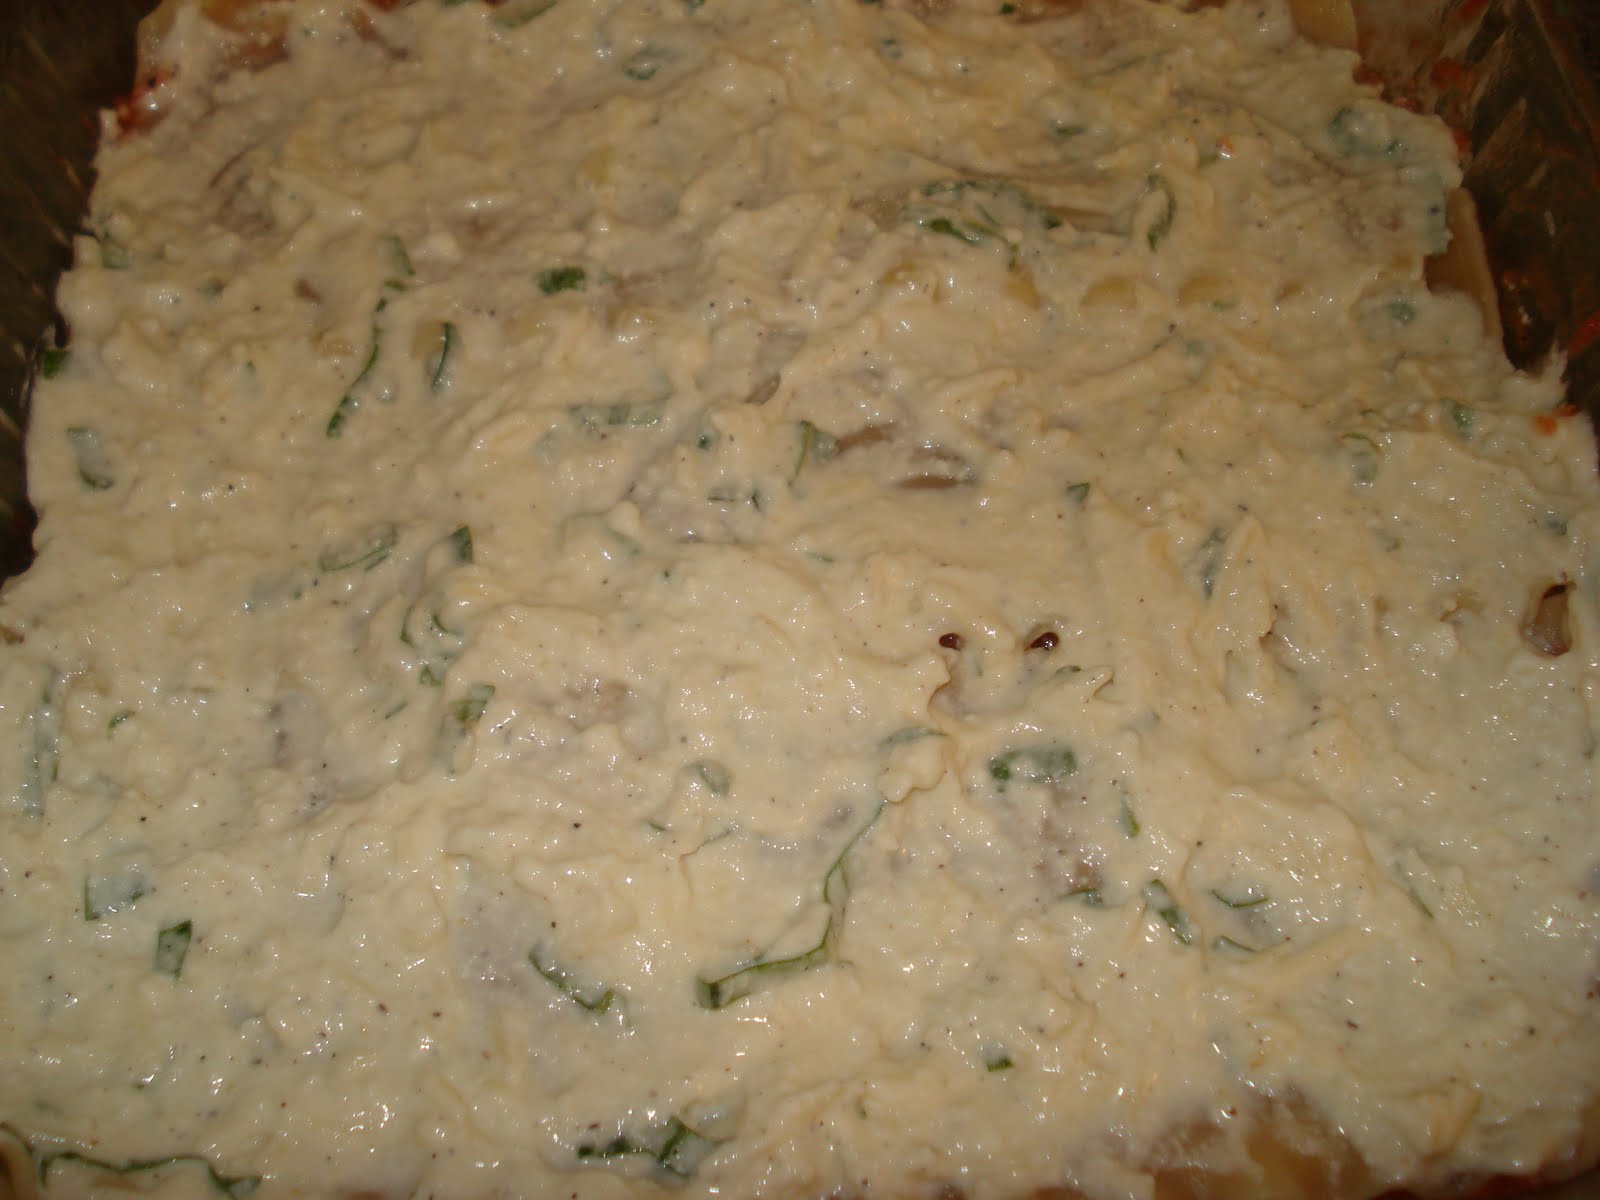
Next layer one third of the ricotta sauce.  The fresh basil in it smells so good!


Then a sprinkling of mozzarella cheese.


Add spinach if you like!  Thinly sliced steamed zucchini would be excellent also!


Layer with tomato sauce, then do the process over again twice.  Noodle, ricotta, spinach, tomato sauce, noodle, ricotta, spinach, tomato sauce.  Then put on more noodles, and the last of the tomato sauce.


Top with the remaining mozzarella and Parmesan cheeses.  Cover with sprayed foil, and bake for 15 minutes.  Remove foil and bake for 25 more minutes.


Look at that delicious lasagna! Lightly browned on top and bubbling on the edges!  Cool for 10 minutes before cutting!  You don't want to cut into it steaming hot....it will make a big mess!


CHUNKY TOMATO SAUCE FOR LASAGNA

Makes: 6 cups

This sauce is also delicious served over regular pasta!

1 T. olive oil
1 onion, minced
salt
6 garlic cloves, minced
1 (28 oz.) can crushed tomatoes
1 (28 oz.) can diced tomatoes
1/4 tsp. dried oregano
1/8 tsp. red pepper flakes
pepper

Heat the oil in a large saucepan over medium heat until shimmering.  Add the onion and 1 tsp. salt and cook until softened, about 5 minutes.  Add the garlic and cook until fragrant, about 30 seconds.  Stir in the tomatoes with their juice, oregano, and red pepper flakes.  Simmer until the sauce is slightly thickened, about 15 minutes.  Season with salt and pepper to taste.


SIMPLE CHEESE LASAGNA

If you don't want to make your own tomato sauce, you can use two 26 oz. jars of sauce.


15 oz. ricotta cheese (1 3/4 cups)
2 1/2 oz Parmesan cheese, grated (1 1/4 cups)
1/2 cup minced fresh basil
1 large egg, lightly beaten
1/2 tsp. salt
1/2 tsp. pepper
6 cups tomato sauce
12 lasagna noodles, cooked
1 pound mozzarella, shredded (4 cups)
1 cup steamed fresh spinach, or frozen spinach thawed (optional)

Heat oven to 375 degrees.  Mix the ricotta, 1 cup of the Parmesan, the basil, egg, salt, and pepper until well combined.

Spread 1/4 cup of the tomato sauce over the bottom of a 9x13 inch baking dish.  Place 3 of the noodles on top of the sauce and drop 3 T. of the ricotta mixture down the center of each noodle, then spread it to an even thickness.  Sprinkle evenly with 1 cup of the mozzarella.  Top with 1/3 cup of the spinach.  Spoon 1 1/2 cups of the sauce evenly over the spinach.  Repeat this layering two more times.

For the final layer, place the 3 remaining noodles on top.  Spread the remaining 1 1/4 cups sauce over the noodles.  Sprinkle with the remaining 1 cup mozzarella and the remaining 1/4 cup Parmesan.  Spray a large sheet of foil lightly with vegetable oil spray and cover the lasagna.  Bake for 15 minutes.

Remove the foil and continue to bake for 25 more minutes or until the cheese is browned and the sauce is bubbling.  Let cool for 10 minutes before serving.


SIMPLE TURKEY or BEEF LASAGNA

In a pan over medium heat, brown 1 lb. of ground turkey breast (or ground beef) with 1 cup of chopped onion.  Add a generous sprinkle of each of the following:  Pepper, Lawry's All Season, Italian seasoning, dried basil, oregano, parsley, and a pinch of red pepper flakes.  Add this to the chunky tomato sauce after you add the garlic and continue with the recipe.  If you are using jarred tomato sauce, simmer meat with sauce for 15 minutes on low heat.


Tuesday, April 20, 2010

Baby Muesli


My son who is almost a year old just loves this Muesli!  The first time I made it for him he tasted it and said, "Mmm!"  I love it too! It is very fresh tasting and makes a great healthy breakfast! Eat it cold or warmed!


Just the right size for baby!


I got the recipe from this book.  It is a wonderful book! Full of great tips and information!


My precious son enjoying Baby muesli for breakfast.


BABY MUESLI


2 T. rolled oats
1 T. finely chopped dried apricots
1 1/2 tsp. raisins
1 T. ground almonds
1/4 cup apple, orange, or pineapple juice
1/2 small apple, peeled, cored, and grated

Mix together the oats, apricots, raisins, and ground almonds in the plastic bowl of a handheld electric blender.  Pour in the juice and leave to soak for 5 minutes.  When softened, blend to make a finer texture, then stir in the grated apple.

Yield:  1 baby sized portion

The book says for babies 8 months or older.

It also says you can add other fruits to this muesli such as chopped peach or banana.

Omit almonds if there is any family history of allergy in the family.

I ground up the almonds and dried apricots in my mini food processor.  I also used it to blend the finished product to a finer texture.

Friday, April 16, 2010

Pick Me Up Coffee Shake

Often in the mid afternoon I get a slump.  What is better to perk you up than a little shot of caffeine! 

If you think you might ever want to make this shake in the next few weeks, get out your coffee pot right now and make double strong coffee.  Then pour it in ice cube trays and freeze until firm.  Put in a ziplock freezer bag and store in your freezer so they are ready when you get the need for a pick me up!

I am drinking this as I type and it is just what I needed this afternoon to get the energy to finish cleaning!


PICK ME UP COFFEE SHAKE


6 double strong coffee ice cubes
2-3 T. chocolate syrup
1/2 cup milk or half & half
1 scoop vanilla ice cream
spray whipped cream
cinnamon

No need to measure on this recipe! Get out your blender and throw in the coffee cubes.  Then squirt in some chocolate syrup, dump in some milk, throw in a scoop of ice cream if you have some.  If you don't have ice cream, or want a less caloric shake, no need to add it! Flip on the blender and let it go! If it gets stuck, add more liquid.  Taste it and see if it needs more of anything.  If it meets your taste buds, pour in a glass, spray on some whipped cream, and sprinkle with cinnamon!  Add a straw and enjoy the moment!

Yield: 1 shake

Thursday, April 15, 2010

Stir-Fried Chicken and Rice Noodles

I love Asian food!  I have tried many different Asian recipes, and many of them call for several different  sauces in one recipe.  This can get costly if you need to buy them all!  What I love about this recipe, is it doesn't call for anything too unusual (the only thing you might not have is the sesame oil) and it is so simple and delicious!!  It has really great flavors! If you don't want to try the rice noodles, it would be excellent served over jasmine rice!  Give it a try and let me know how you like it!


The chicken marinates for about 20 minutes.  Then you saute it and set aside.


Saute the veggies.  I love the bright greens!


These are the rice noodles.  Boil water, then remove from heat and stir in noodles.  Let sit for 10 minutes or until tender.


Mmm! Love these flavors!


Mix in the noodles and top with roasted peanuts!


STIR-FRIED CHICKEN AND RICE NOODLES


2 1/2 tsp. cornstarch
1/3 cup low sodium soy sauce
1/4 cup white wine or low sodium chicken broth
2 tsp. sesame oil
1 1/2 lbs. chicken breasts, cut into 1 inch cubes
1/2 cup low sodium chicken broth
2 T. sugar
1 T. Worcestershire sauce
3/4 tsp. chili powder
3 oz. uncooked Asian rice noodles
4 tsp. canola oil, divided
3 cups fresh broccoli florets
2/3 cup green onions
3 garlic cloves, minced
2 tsp. minced fresh gingerroot
1/4 cup unsalted dry roasted peanuts

In a small bowl, combine the cornstarch, soy sauce, wine or broth, and sesame oil until smooth.  Pour 1/4 cup marinade into a large resealable plastic bag; add the chicken.  Seal bag and turn to coat.  Refrigerate for 20 minutes.

Add the broth, sugar, Worcestershire sauce and chili powder to remaining marinade; set aside.

Cook the rice noodles according to package directions.  Meanwhile, drain and discard the marinade from chicken.  In a large skillet or wok, stir-fry chicken in 2 tsp. canola oil until juices run clear; remove and keep warm.

Stir-fry broccoli in remaining canola oil for 5 minutes.  Add the onions, garlic, and ginger; stir fry 3-5 minutes longer or until broccoli is tender.  Return chicken to the pan.

Stir reserved broth mixture and stir into pan.  Bring to a boil; cook and stir for 2 minutes or until thickened.  Drain noodles; toss with chicken mixture.  Garnish with peanuts.

Yield: 6 servings

Note:  Gingerroot usually comes in fairly large pieces, and recipes usually only call for a small amount.  I buy a piece of gingerroot, peel it, and put in a freezer bag and store in the freezer.  Then when a recipe calls for it, I remove from freezer and grate frozen.  Then you always have fresh ginger on hand and don't have ginger rotting in your pantry! 

Popular Posts